Quantcast
Channel: Fun FOOD Frolic
Viewing all 1338 articles
Browse latest View live

Pahadi Gahat (Kulath) Ki Dal

$
0
0

Pahadi Gahat/Kulath Ki Dal is horse gram stewed with humble spices to create hearty wholesome brown curry, which is actually of deep brown color with some shades of light brown. To many of you the name at first sound really weird - horse gram, the whole seeds of this bean are fed to cattle and I guess that explains the story behind this name, better I should refer to it with other name Gahat in the post.


Like many other local ingredients in Uttarakhand Gahat is also grown with many hardships in those lovely terrace farms, where unworldly famers work hard for days and months for the ample harvest of this bean to enjoy a bowl full of nourishing stew during the bad winter days with their families, when their farms are nothing but the storehouse of dew and fog, soil is damp and reluctant to bear any fruits of nature, sun play month long hide and seek, their nights get warm with dinner of Gahat Ki Daal and Roti.


My mother who has spent considerable part of school vacations in her paternal village - Paithani, as a cook has great affection for terraced paddy fields produce, during our growing up years every year one of her distant cousin before the first winter breeze use to send one bag full of Pahadi Gahat along with Pahadi Bhatt (black soybean) and Mandua flour, he never send it a month earlier or later, always right on time, then she would glee in pride by looking at ancestral land produce and treasure all these condiments like a prized possession until next winter using wisely and occasionally in our daily meals.


On a bright sunny winter Sunday mood for Gahat ki Daal and Bhaat (steamed rice) was all staged by the weather, in heavy traditional cast iron pot daal was stewed with aromatic ginger, garlic and herbs chopped up in a haze, spoonful of colored flavors known as spices were thrown in and finally some rice flour paste to thicken the curry, then began the trial of patience of our growling and howling stomachs, curry is slow cooked for quiet sometime for the flavors to develop and also to tease our senses with the alluring aroma of it. And at last time for sizzling melodrama of Indian kitchen - tadka (tempering), with ladle full of ghee, cumin, and herbs I waited for the seeds to do the little crackling performance and finally grace the curry with the tadka.


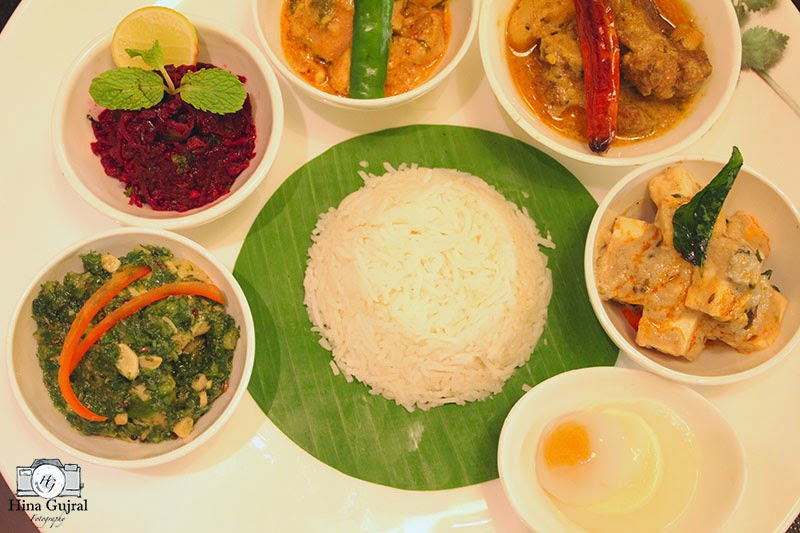
Table was laid, dinner napkins unfolded, rice was perfectly steamed and fluffed, salad could not be more greener, pickle jars were uncorked and here arrived the centerpiece of the lunch table - Gahat Ki Daal laced with sweet smell of ghee, garlic, herbs and hours of simmering over the low flame. One spoonful of it and it seems my hunger is been satiated, this uncomplicated taste of Gahat ki Daal always make me realize how deeply attached I am to my roots.

Recipe: Pahadi Gahat Ki Dal

Yield: Serves 4

Ingredients:
1 Cup Gahat / Kulath / Horsegram
1 green chili, chopped
1 inch piece of ginger, peeled and grated
3 - 4 cloves of garlic, finely chopped
¼ tsp turmeric powder
1 tsp red chili powder
Salt, as per taste
1 tbsp rice flour mixed with ¼ Cup water to make paste

For tempering:
2 tbsp ghee
¼ tsp asafoetida
1 tsp Jumbu (a local herb, optional to add)
1 tsp Gandherin (a local herb, optional to add)

Method:
Clean, wash and soak dal in water for 1 hour.
In a pressure cooker add dal with 4 Cup water, green chili, grated ginger, garlic, salt, red chili and turmeric powder. Give it a nice stir. Close the lid of pressure cooker and place it’s weight on.
Cook dal in pressure cooker over low heat until you hear 3 - 4 whistles. Let the pressure release naturally. Open the pressure cooker and check dal for doneness.
Now in a heavy bottomed saucepan transfer dal, add jumbo, gandherin if you are using along with rice paste. Stir nicely and let dal simmer over medium heat for 20 minutes. Stirring ocassionally and gently mash dal once with back of the spoon to thicken it.
This way dal is thickened and flavor of herbs are infused well in dal.
For tempering the dal, heat ghee in a small pan add cumin seeds once they crackle add asafoetida, immediately add this tempering over the dal and mix nicely.
Serve hot!


Thanks for stopping by
Hina

Garam Masala Spiced Gingerbread Cake with Nolen Gur

$
0
0

Garam Masala Spices Gingerbread Cake is my adaption of classic Gingerbread Cake with a hint of very Indian Garam Masala and sweetened with Nolen Gur (Date Jaggery). The combination of ginger, spices and Nolen Gur is like match made in heaven though fixed in my kitchen. The idea of unusual marriage of spices in a cake was there in my mind from a long time and with a bottle of Nolen Gur in hand it finally came into picture and we simply loving every bit of this creation. 


Nolen Gur or the Kajur Gur as they say in Hindi is the jaggery that flavors Bengal's winters, apart from its heavenly taste, the gooey yet slippery, finger-licking consistency of the gur elevates the experience of consuming it to a sinful level. A spoonful of it and I was reminded of dark sticky caramel or very fine quality molasses, and somehow after first tasting only fallen for this natural sweetener. The making of Nolen Gur is a time taking and tedious process, community of skilled workers still make it in a traditional manner right before the auspicious Durga Puja and henceforth market is flooded with these light brown ordinary looking sugar balls. 


One mundane day my friend dragged me to one of the Bengali restaurants, with no charm or fascination for the place I went along just to accompany her. It was 11:00 am in the morning while I was about to order the regular Aloo Poshto and Luchi a timid young lad came and asked if we like to try Nolen Gur ice cream, at first instance his question sound odd and was dropped on us out of the blue, but sometimes it is hard to dishearten somebody at such early hours of the day. Within a few minutes of our approval he came back with two bowls full of Nolen Gur ice cream, it was for the first time I was starting my day with a scoop of ice cream. With much apprehension I tasted one spoonful of it and that was my first introduction with Nolen Gur, which was definitely a memorable one. 


By the end of the lunch the same lad packed some Nolen Gur for me with a heart warming smile, saying "meetha kuch banayega isse" (make some dessert out of it), like a precious treasure I stored it in my fridge for months looking for a recipe that can do justice to this Bengali delight. Christmas time, KitchenAid Blogger Contest and chilly weather I could only think of festive bake, so this is how Garam Masala Spiced Gingerbread Cake with Nolen Gur came into existence. 


Stepwise Illustration
Recipe: Garam Masala Spiced Gingerbread Cake

Yield: Makes 10 inch round cake

Ingredients:
2 ¼ cup all-purpose flour
2 tsp baking powder
2 tsp Garam Masala(includes nutmeg and cinnamon)
120g butter, softened, plus more for greasing pan
1 cup boiling water
2 tsp baking soda
2/3 cup dark-brown sugar
1 cup Nolen Gur, melted or in liquid form
2 inch piece of ginger, peeled and grated
2 eggs, at room temperature

Method:
Preheat oven to 170 degree celsius for 10 minutes. Meanwhile grease one 10-inch cake pan with butter and line the base with parchment paper, set aside.
In a pan boil water along with grated ginger, boil for 5 minutes so that aroma of ginger is infused in water. Combine baking soda in water and set aside.
With electric beater cream butter until light and fluffy for about 3 - 4 minutes. Beat in brown sugar until fluffy. Add Nolen Gur and beat for another 2 - 3 minutes. Now add ginger infused boiled water and eggs. Make sure water has become lukewarm before adding else eggs will get poached.
Beat the liquid mixture for 5 minutes at medium speed.
In a large bowl, sift together flour, Garam Masala and baking powder. Add sifted dry ingredients to liquid mixture in three batches folding batter gently each time to combine.
Pour batter into prepared pan; bake for 35 minutes. After 35 minutes insert a toothpick in the center if it comes out clean, cake is ready else bake for 5 to 10 minutes more.
Let cool on a wire rack in the cake pan for 15 minutes. Transfer to a large plate. Cut into squares; dust with confectioners' sugar.
Serve with whipped cream and black coffee.

This is my entry for KitchenAid Christmas Blogger Contest

“Get a special ‘Christmas Frosting Kit’ as gift with purchase of the iconic KitchenAid 4.8 L Tilt Head Stand Mixer from 1st-31st December 2014, and make delectable memories this Christmas. For more details, visit www.christmas.kitchenaidapac.com #KitchenAidTurnsSanta”


Thanks for stopping by
Hina

Maddur Vada (Deep Fried Savoury Fritters)

$
0
0

Maddur Vada is deep-fried savory fritters made with combination of different flours, semolina and lots of onion. Maddur Vada is one of the well liked dishes across South India, it's origin is claimed to be in the small town of Karnataka called Maddur in Mandya district, this town is located somewhere between Bangalore and Mysore the two most fundamental cities of the state.


During one of my trips from Bangalore to Mysore in train during early morning hours, hustle bustle in the station at morning wee hours made me realized how busy is the route between two cities and many people commute daily across the cities to earn their bread and butter. In the midst of this engaging environment at one of the stations I stepped out of the train in search of coffee to wake my senses from slumber and luckily found one just outside my coach. While I was sipping perfectly brewed filter kapi from small plastic cup a vendor sitting nearby with one large sized steel vessel caught my attention, he was selling something which looked similar to Pooris but much thicker, people around were relishing it with chutney and cup of tea/coffee. Growling stomach and hungry curiosity took me to that vendor, in adapted South Indian accent I asked him "What is this?" and the reply came in rhythmic monotone "Maddu Vada" I barely understood the name but could figure out it is some kind of vada. 

The round disc which I assumed to be vada was looking freshly made for the morning sale and tempting enough to give it a try, bought one for Rs. 10.00 which the vendor passed on to me in a piece of newspaper with spoonful of coconut chutney on top of it. With much apprehension I took small bite, it was crunchy, crisp from outside with flavors of onion and curry leaves bursting from each corner of vada, the shiny layer of oil on top was telling tale of deep frying, I thoroughly enjoyed every last bit of it. That was my first introduction with Maddur Vada, and so far I figured out it is vada made of onion, semolina, curry leaves and deep fried without knowing it's first name.


While the next day I was coming back to Bangalore few vendors came in our couch selling same vada in their steel vessels, there was one lady sitting next to me clad in silk saree embellished with gold ornaments and fresh garland of jasmine flowers arranged neatly on her plait, her persona was convincing enough to confirm that she belong to the Southern states, I asked her the same question when vada vendor came near us "What is this?" she unfolded the mystery for me and I finally get to know the name Maddur Vada. With my question she got the inkling that Maddur Vada is something I have never seen, tasted or cooked before and in her broken English she started narrating the recipe to me, without wasting a single second I scribbled the ingredients and instructions on a piece of paper. That is how I got the recipe for Maddur Vada and every time I make it at home from the bottom of my heart I thank that lady who unlocked the secret of making Maddur Vada.

Wishing all the readers A Very Happy & Prosperous New Year!


Recipe: Maddur Vada

Yield: Make 12 - 13 vadas

Ingredients:
1 Cup all purpose flour
1 Cup semolina
1 Cup rice flour
1 large onion, finely chopped
1 tsp ginger garlic paste
2 tbsp refined oil
1 green chilli, finely chopped
4 - 5 curry leaves, chopped
A fistful of coriander leaves, fine chopped
Salt, as per taste
¼ tsp red chili powder
Lukewarm water to bind dough
Oil for deep frying

Method:
Sift all purpose flour, semolina and rice flour together in a bowl.  
Drizzle in 2 tblsp of refined oil over the sifted flour mixture and rub with your fingers to get bread crumb like texture..
Now add chopped onion, curry leaves, green chilli, coriander leaves, ginger garlic paste, salt, red chili powder and mix well.
Using lukewarm water 1 tbsp at a time bind firm and smooth dough. Make sure not to use too much water dough should be like Mathri/Poori dough. Knead for 1 - 2 minutes and then let the dough rest for 10 mins.
Divide the dough into gooseberry size balls of equal size. Take one ball in between your palms and flatten gently with your fingers. Keep thickness of vada ¼ inch or similar to mathri.
Meanwhile heat oil in heavy bottomed deep frying pan over medium heat. Once all the vadas are shaped deep fry in oil till each turn golden on both sides.
Drain on an oil absorbent paper. Serve hot with chutney.

The "Maddur Vada Recipe" is part of the endeavor to create a collection of recipes of Traditional Indian Cuisines in collaboration with a few bloggers who share the same passion of cooking.

You can find more Traditional Recipes from Karnataka by #thekitchendivas:


Thanks for stopping by
Hina

Lal Mirch ka Achaar (Stuffed Red Chili Pickle)

$
0
0

Lal Mirch ka Achaar or lal mirch ka bharwa achaar is red chili pickle stuffed with homemade spice mix soaked in mustard oil, this pickle takes 2 - 3 days in warm winter sun rays to get ready for consumption and has shelf life 1 year if stored in sealed jar at room temperature and handled with great care. This recipe is adapted from extremely talented food writer and consultant Sangeeta's blog called Banaras KaKhana with her due permission. 


For a country that is obsessed with food and everything to do with food, pickles are an integral part of our food culture. Spicy, tangy, sweet, sour, bitter are some of the defining words for Indian pickles, our pickles range for every season, from every region and of all the local produce. Over the years pickles have become ritual in our household kitchens and an inseparable part of our tradition, if we peep into the history we could easily find traces of pickle in the royal kitchens, even the greatest of emperors could not resist the temptation of evoking their taste buds with slug of pickle. A small spoonful of pickle in the plate add on so much flavors that it brings even the dullest of meals to life, such is the magic of pickle. 


Since I got married pickling is one technique in kitchen which I never attempted maybe I was too content with yearly supply of pickles from my mother-in-law and it is human nature not to make efforts towards something which is easily accessible.  While I was busy plunging into the gifted pickle jars words of my mother always ring a bell in my ears, "Pickling is an art which only few can master." And now I can comprehend the depth of her words with much more seriousness when I made my first genuine attempt towards grasping the science of pickling, unlike other dishes pickling cannot be learnt by blindly following the recipe, at each and every step of pickling one need to apply some amount of wisdom, basic knowledge of ingredients behavioral science and observant culinary senses.


When I first spot these light airy deep red chilies in supermarket my reflexes could only think of stuffed red chili pickle, which my palate was craving from a long time. Back home the chilies were tucked in fridge for few days while I was desperately searching recipe for a naive pickling enthusiast like me. Once I found the recipe the pickling marathon began, somewhere deep within there was a desperate urge to prove that pickling is my cup of tea, which simply magnified my attention to detail syndrome. After waiting for the preferable weather mood finally the day was marked when quite winter air in the house was filled with pickle masala drenched in deep golden mustard oil with nervous fingers when I stuffed chiles with the masala my senses were shaken up from deep slumber with the rustic aroma of chilies and the masala. For three days I kept my fingers crossed and a hawk eye on the pickle jar my routine chores included shifting the pickle jar as per the sun rays during different hours of the day. After so much work of patience and uphill battle when we first tasted the pickle my heart was filled with pride and eyes were moistened on the success of my first step towards the art of pickling.

Recipe: Lal Mirch Ka Achaar
Recipe Adapted from Banaras Ka Khana

Yield: 8 - 10 medium sized red chilies

Ingredients:
10 medium size thick red chilies
1/4 Cup mustard oil

For the stuffing masala:
2 tbsp mustard oil
2 tbsp amchoor powder
1 tbsp red chilly powder
3 tbsp black mustard seeds
1 tbsp fennel seeds
1 tbsp fenugreek seeds
1 tbsp ajwain seeds
2 tsp kalonji seeds (nigella seeds)
2 tbsp salt or to taste

Method:
To prepare chilies for the pickle wash, wipe with a kitchen towel and sun dry for 1 - 2 hours to completely dry them.
While chilies are sun drying prepare the masala. Add all the masala in grinder jar except mustard oil and blend to make a coarse powder. Once masala is powdered mix in mustard oil and mix nicely with a spoon.
Wear surgical gloves or kitchen gloves if your skin is sensitive to chilies.
With a sharp knife cut off the crown of the chilly and slit in between lengthwise half way through leaving intact from the lower end. Using knife hollow out the innards of the chilies, including all the seeds and the veins.
Now stuff each chilly with the masala. I filled masala with my fingers to evenly stuff the chilly with masala.
Arrange all the chilies in clean, dry jar. Drizzle mustard oil from top over the chilies in jar.
Seal the jar with lid and keep in the sun. Pickle takes 2 - 3 days in bright sun to get ready.
You can drizzle some more oil into each chilly everyday.
Once ready pickle can be stored at room temperature for 1 year.

Note: Always keep water away from pickles even a single droplet of water is enough to spoil the entire pickle.


Thanks for stopping by
Hina

Jowar Upma Recipe

$
0
0


Jowar Upma Recipe is made from sorghum pearls that are stir-fried along with seasonal vegetables, and flavored with garlic, peppers and vegetable stock. Jowar is one of the five top cereal crops in the world rich in protein, iron, and fibre. Jowar also has great antioxidants properties and is also gluten-free, hence making this Jowar Vegetable Upma a great choice for gluten free diets.

To know more about Gluten you can read my article - Making Sense of Gluten   


Recipe: Jowar Upma

Yield: Serves 4

Ingredients:
2 cup Jowar pearls
1 onion, finely chopped
1 medium size carrot, finely chopped
1/4 cup sweet corn kernels
1/4 cup green peas
2 tbsp peanuts, roasted
2 cloves of garlic, crushed
Juice from 1 lemon
Salt, as per taste
2 tbsp olive oil
4 cups vegetable stock or water

To Garnish:
A small bunch of chopped coriander leaves

Method:
To prepare Vegetable Jowar Upma Recipe, wash and soak Jowar pearls overnight or for at least 6 - 7 hours in water. Jowar is a millet that takes a long time to cook, so it is important to soak it.
Once the Jowar is soaked, drain the excess water. Place the Jowar into the pressure cooker along with 4 cups of vegetable stock and salt. Cover the pressure cooker with its weight on. After about one whistle, turn the heat to low and simmer for about 10 minutes and turn off the heat. After 10 minutes turn off the heat and allow the pressure to release naturally. The Jowar will continue to cook in the pressure that exists in the cooker.
Open the lid of the pressure cooker and check Jowar pearls for doneness. Jowar pearls have chewy texture in comparison to other grains.
Heat oil in a saucepan over medium heat and saute the chopped onion, for a couple of minutes. Once the onion turns translucent, add the peanuts and saute for another 2 - 3 minutes.
Now add corn kernels, peas and chopped carrot. Saute for 5 minutes.
Next add the Jowar, salt and black pepper. Stir nicely to evenly combine the seasoning.
Cover the pan with a tight fitting lid, reduce the heat to low and let Jowar Upma cook for about 5 minutes.
Turn off the heat and drizzle lemon juice over upma. Garnish with chopped coriander leaves. Serve Jowar Upma hot with chutney.


Thanks for stopping by
Hina

Pineapple Kesari Baath (Pineapple Halwa)

$
0
0


Pineapple Kesari Baath is also addressed as Pineapple Rava Kesari across Karnataka, which could be found in the menu of every local eatery in the state. The dish shares homogeneous nature with popular North Indian delight Sooji Ka Halwa (Semolina Pudding) both have semolina as key ingredient the only differentiating factor is Pineapple, Kesari Baath is cooked in flavorsome pineapple syrup. The pineapple syrup is slightly thick yellow liquid, which consists of scented saffron, garden fresh pineapple cubes and juice simmered over low heat to get the sweet smelling fruit compote. While the liquid is bubbling in pot semolina is roasted in dollops of ghee with large viridescent cardamom pods from the valley of Coorg, roasting semolina is task of patience but the changing colors of semolina in the process are true virtual treat and rare sight, where in actuality you can see your hard work showing up fruitful colors. 


With each spoonful of pudding melody of flavors is created in palate, tropical freshness of pineapple is melted with sweetness of sugar, ghee and semolina building layers of rare sapor and not to forget the pleasing aroma which filled senses with long lasting memory of the pudding. Sometimes humble experiences can usher so much joy in life even the trivial moments turn into long lasting honeyed memories. 


You can shape this Halwa into Barfi also, grease a wide tray and spread halwa in it, once it cools down, with a knife cut into diagonal pieces or any other shape you like but that is totally depends on personal choice and preference, sometimes to break the monotony I serve it in the shape of fudge which makes plating and serving much more simpler when there is large gathering around. 

Recipe: Pineapple Kesari Baath

Yield: Serves 6

Ingredients:
1 Cup semolina
1 1/2 Cup pineapple, finely chopped
3 Cup water
1 Cup pineapple juice
1 Cup sugar or adjust as per the sweetness of pineapple
1/4 tsp yellow food color
2 tsp pineapple essence
A pinch of saffron strands
1/4 Cup ghee
2 green cardamom pods, crushed
2 tbsp raisins

To serve:
1 tbsp ghee
Slivered cashew
Few strands of saffron

Method:
In a large deep vessel bring water, juice, pineapple essence, saffron, food color and chopped pineapple to a boil over high heat. Reduce the heat to medium and let the liquid simmer while roasting semolina.
To roast semolina heat ghee in heavy bottomed wide pan over medium heat once ghee is heated add crushed cardamom pods sauté for 10 seconds and add semolina.
Roast semolina over medium heat until it changes color to light brown.
Now slowly add hot pineapple water along with pineapple pieces to roasted semolina. Add half amount of water at a time stir semolina nicely and then gradually add the remaining half. Stir vigorously to avoid formation of any lumps in semolina.
Once liquid is reduced little bit and semolina is cooked mix in sugar and raisins. After adding sugar the consistency of halwa loosen up little bit. Cook for 2 - 3 minutes more stirring continuously. Do not cook for too long as kesari baath has dropping consistency.
To serve, heat 1 tbsp ghee in a pan and roast cashew slivers and saffron for 2 minutes. Pour ghee along with cashew and saffron over kesari baath just before serving. Serve hot!


The "Pineapple Kesari" is part of the endeavor to create a collection of recipes of Traditional Indian Cuisines in collaboration with a few bloggers who share the same passion of cooking. Here is the link to Pinterest board

You can find more Traditional Recipes from Karnataka by #thekitchendivas:


Thanks for stopping by
Hina

Sarson Ka Saag with Makki ki Roti

$
0
0

Sarson ka Saag with Makki ki Roti is traditional and staple winter delicacy from the land of five rivers Punjab, pungent mustard leaves are stewed with other winter greens like spinach, fenugreek, radish, slow cooked for hours over low heat to get hearty and healthy green casserole. During winter dew enveloped fields are graced with lustrous mustard leaves dotted with yellow flowers of the plant like sunshine in the darkness and then these tender mustard leaves are carefully plucked by the skillful farmers to furnish local vegetable market with the bountiful produce. Sarson ka Saag is accompanied by flatbread made of maize flour rustically shaped with delicate fingers into moon like round with uneven edges and cooked over stove top to get that earthy taste in the bread. This is the simplest recipe of Sarson ka Saag passed on to me by Sikh mother-in-law which she in turn learnt from her mother-in-law. 


The Sikhs ruled the kingdom of Punjab prosperously till the beginning of British era in India, unfortunately during the partition of India the Punjab province and the Sikh community were divided into equal halves, many left their beloved ones in Pakistan and came to India to start life over again. They travelled across India  in search of work opportunities that's the reason you can find Sikh not only in every corner of the country but all over the world. The community excelled in farming and slowly they cleared malarial swamps, barren lands and dense forests into rich farms hence became the founding fathers of Green Revolution in India, even today Punjab still remains the Granary of India.


The Sikh community is also admired for their lifestyle, food and culture, from the early days only Sikhs are known as great eaters, the Sikh cuisine is a mix bag of robust vegetable curries, healthy mixed lentil stews, fatty meat curries, wholegrain flatbreads laden with homemade ghee and all washed down with gallons of freshly churned buttermilk. This kind of wholesome and nourishing diet was designed for energetic, diligent farmers and warriors with well built physique and stamina who worked hard day and night but slowly this became the food culture of the whole community religiously followed in every Sikh household including mine. 


Winters are welcomed in Sikh household with bottles full of deep brown jaggery chunks making it to the kitchen shelves, family gatherings during the evening around bonfire are accompanied by uninterrupted supply of groundnut, masala chai and chikki (sweet made of dry fruits, groundnut and jaggery). The dinner table is embellished with mutton curry, unpretentious dal caped with blobs of homemade white butter (see recipe here) and then there would be Sarson Ka Saag the centerpiece of the dinner table,the sweet smelling aroma of the Saag engulfs the air around teasing one's appetite and there comes continuous supply of piping hot Makki ki Roti smeared with ghee from the kitchen to sop up the Saag. The whole experience of enjoying this home cooked scrumptious meal is one of those soul satisfying experience for a food lover. And before you retire to bed the last conversations of the day are done with a steaming glassful of Khus Khus and Almond Milk (recipe coming soon on the blog).


Recipe: Sarson ka Saag

Yield: Serves 4

Ingredients:
2 bunch mustard greens
1 bunch spinach leaves
1 bunch bathua/Soya greens/methi greens/radish greens (any one of these)
1 large onion, roughly chopped
2 medium size tomato, roughly chopped
1 green chili, chopped
4 - 5 garlic cloves, smashed
An inch piece of ginger, peeled and chopped
1 Cup corn kernels (optional)
Salt, as per taste
2 tsp red chili powder
2 tbsp ghee

For tempering:
2 tsp cumin
2 tbsp ghee

Method:
To make saag first, clean, wash and chop all the greens (mustard, spinach and other). Once chopped soak them in water for 15 - 20 minutes to get rid of dirt particles.
Drain greens in a colander and set aside until required.
Heat ghee in a cooking vessel over medium heat and saute chopped onion, ginger, garlic and green chilies over medium heat for 10 minutes or until onion turn light brown in color.
Now add chopped tomato along with salt and red chili. Saute for 5 minutes over medium heat.
Once tomato is sauteed add chopped greens and stir nicely.Saute till greens turn soft in texture.
Add 4 Cups of water and let saag simmer over low heat till water is reduced to half and greens are completely cooked. Grind the saag in blender either to smooth puree or to coarse consistency, whichever way you prefer.
If you are adding corn kernels then saute them in a pan with 1 tbsp of oil and add to the pureed saag. If not, then simply skip this step.
Transfer saag into a saucepan and turn on the heat. Let it simmer over low heat while you prepare tempering.
For tempering, heat ghee in a small pan add cumin and once it starts crackling add dry red chilies. Pour tempering over the saag and mix nicely.
Cook saag for 10 minutes more and then turn off the heat.
Serve hot with Makki Ki Roti with more ghee on top.

Recipe: Makki ki Roti

Yield: Make 6 to 8 Roti

Ingredients:
2 Cup maize flour
½ Cup whole wheat flour
Salt, as per taste
2 tbsp refined oil
Lukewarm water to bind dough

Method:
To prepare dough, sift flours and salt together in a bowl.
Add oil and gently rub the flour in between fingers to get crumble like texture.
Using little lukewarm water at a time bind smooth and firm dough. Knead for 5 minutes and then shape into a round ball. Transfer dough to a clean dry bowl covered with a kitchen towel. Let dough rest for 15 minutes.
To make roti, heat iron skillet (tawa) over medium heat.
Line kitchen counter surface with a clean dry plastic sheet. Grease it with 1 tsp of oil. Pinch a portion of dough and roll into a ball and then flatten the dough ball using fingers.
Place the flatten dough ball over the plastic sheet and with a rolling pin roll out to medium size roti of approximately 3 inch diameter. Makki ki Roti is little thick so make sure not to roll it out too thin like regular chapati.
Now slowly transfer the roti from plastic sheet to your palm. Greasing plastic sheet beforehand makes this step easier.
Place the roti from your palm to heated skillet and cook on both sides. Do not flip roti more than once or twice as it is bit fragile.
Cook roti direct heat like Chapati over medium flame, flipping in between to cook evenly from both sides. Brown spots or charred marks will appear once roti is cooked.
Transfer to plate and and smear either white butter or ghee. Serve hot with Sarson ka Saag.

Thanks for stopping by
Hina

Rava Idli (Steamed Semolina Dumplings)

$
0
0

Rava Idli is a soft pillowy steamed semolina dumpling seasoned with mustard seeds, curry leaves, urad dal and cashew. There are many theories about the curation of Rava Idli but all of them are intertwined in Karnataka only, so it could be said that Rava Idli have it's roots in the state. Many food historians condemn traces of Rava Idli in the pre modernization era of Karnataka and then there are stories to substantiate the household presence of Rava Idli in the last few decades only. Today the Rava Idli has become a staple dish in the cuisine of the state and hence I could not chalk it out from my list while thinking of Karnataka nouvelle cuisine. 


Rava Idli is one of those few dishes I learnt to cook as a novice housewife and even till date I am equally fond of these cottony soft dumplings dipped in piping hot sambhar accompanied by perfectly brewed cup of filter coffee. The uncomplicated process to prepare these idlis is always one of those pleasurable experiences in the kitchen when deep down in your heart  as a cook you are affirmative about the flawlessness of the end result. Over the years I tried enlivening the flavors of Rava Idli by trying different permutation combinations of seasonings and seasonal vegetables but somehow the end result always made me crave for the bonafide flavors of Rava Idli. 


Though the recipe calls for few basic ingredients only but still there are some tipping points which makes difference between the good and the exceptional Rava Idlis. One of them is the quality and taste of baking soda, try to use neutral flavored baking soda to avoid ending up with fruity tasting idlis. And the most important one which I learnt after many disastrous trials of rave Idli is to use the sour curd, I prefer using sour curd rather than fresh curd to make Rava Idli, some how the temperature and sourness of curd really matters for the texture of the idlis. Also resting batter for a short span before mixing baking soda helps semolina absorbing moisture and flavors in a better way and tend to produce moist, mouth melting idlis. 


Recipe: Rava Idli

Yield: Makes 10 idlis

Ingredients:
1 Cup semolina (rava)
1 Cup curd, at room temperature
1/4 Cup water
1/2 tsp baking soda
Salt, as per taste
1 medium size carrot, finely chopped
1 tsp urad dal (split black lentils)
1 tsp chana dal (split bengal gram)
1 tsp mustard seeds ( rai / sarson)
2 curry leaves, chopped
4 cashew, finely chopped
2 tbsp ghee

Method:
In a pan heat ghee over medium heat once ghee is heated add mustard seeds and saute for few seconds.
As mustard seeds start crackling add chopped curry leaves, urad dal, chana dal and saute till dals turn light brown in color.
Now add cashew and fry for 1 - 2 minute.
Add semolina to the tempering mixture and roast it over medium heat till semolina turns pale brown in color and it’s aroma is released. Stirring continuously while roasting.
Turn off the flame and transfer semolina to a bowl. Set aside until it cools down to room temperature.
Combine tempered semolina, curd, salt and water in a bowl to prepare idli batter. Batter should be of dropping consistency and not too runny if required add more water to get the right consistency. Cover the bowl with a lid and set aside for 15 - 20 minutes.
After 20 minutes mix in chopped carrot into the batter. Stir to mix carrot evenly.
Prepare your idli steamer and grease the mold with little ghee to avoid idli sticking to the mould.
I usually prepare these idlis in microwave so my idli steamer is microwave friendly which does not require any pre heating of water beforehand but if you are using gas steamer to make idlis than you need to heat water in steamer before pouring the batter into the molds.
Once steamer is ready add baking soda to the batter and stir nicely to combine evenly. The idli batter will turn frothy immediately pour spoonful of batter in each mould.
Close the lid of the steamer and steam idlis. In microwave it takes 5 - 6 minutes while in gas steamer it takes 10 minutes. To check idlis for doneness insert toothpick and check if it comes out clean means idli is done.
With the help of a spoon remove idlis from the mould. Transfer to a plate and serve hot with Sambhar.

The "Rava Idli" is part of the endeavor to create a collection of recipes of Traditional Indian Cuisines in collaboration with a few bloggers who share the same passion of cooking. Here is the Pinterest Board collection of recipes.

You can find more Traditional Recipes from Karnataka by #thekitchendivas:


Thanks for stopping by
Hina

Good Read Article #5 - Pasta Demystified with Asus Zenfone 5

$
0
0

Pasta is one of the staple dishes from Italy that slowly made it's way in all across the world because of it's simple and versatile nature. Today this unusually shaped ingredient could be found in all the supermarkets and the pasta manufacturing giants left no stone un-turned in the last few decades to popularize Pasta as an essential grocery item for every household. Almost all the regions of Italy have their own theory about the origin of pasta. The Ligurians assume that Genoese merchants adapted it from nomadic people of Mongolia and brought it back home while Venetians believe Marco Polo imported noodles from China. In Rome they have altogether different theory of inheriting pasta from the royal kitchens despite of controversial originating history pasta is passion all over Italy today.


Pasta is one of my favorite ingredients to cook with and a deliciously cooked pasta sautéed in flavorful sauce paired with right wine is my idea of comfort food. Over the years there is more and more intrusion of pasta in our Indian kitchens and very comfortably it made place for itself in the kitchen shelf beside lentils and masalas. When Asus team came up with the idea of sharing my thoughts about newly launched Zenfone 5 I thought of combining two most dynamic crafts food and technology to make this post more interesting for the readers.


The variety of pasta......
It is a fact that today pasta comes in more than 300 varieties of different shapes and sizes - penne, fusilli, spaghetti, farfalle, rigatoni, ravioli, tagliatelle are few popular ones. But technically pasta is only of two type - laminated pasta and extruded pasta, pasta fresca or laminated pasta means the fresh, homemade pasta with a dough of three basic ingredients - water, flour and eggs. While pasta secca or extruded pasta is a manufactured commercialized product, which, because of its impeccable tradition, elegantly overcomes the arguments for and against "ready-made" foodstuffs. In extruded pasta also there are two varieties - teflon dice pasta and bronze dice pasta, pasta extruded from machines using bronze dice has rustic finish and rough surface which is more sought after by the Chefs as the sauce clings better to the rough surface of the pasta. But bronze dice pasta could not be produced in large quantities due to slow extrusion process hence the pasta we usually buy from supermarket is reasonably priced teflon dice extruded pasta.


The proper way to cook pasta.....
Pasta is quick to cook and is always successful if certain basic rules are always followed. The pan it is cooked in should be as big and deep as possible to have enough room for pasta while boiling. There is never too much of water while boiling pasta but there should not be less water ideally the thumb rule to follow is 4 Cups of water to 100 grams of pasta, to prevent pasta from sticking together. The water should always be seasoned with salt to flavor the pasta. Once water comes to a roaring boil then only pasta should be added and the water must be rapidly boiling throughout the whole cooking time. But hand rolled stuffed pastas like ravioli should not be cooked in violently boiling water it may damage the pasta. 

Cooking time for pasta depends on size, quality, variety so the best way to test pasta for doneness is to taste. Once pasta is cooked as per as per your preference transfer the contents of the pan through a metal strainer reserving some of the boiling water to flavor the sauce. If sauce is already prepared then strained pasta can be immediately added to the sauce else rinse boiled pasta under running water to prevent starch from sticking it together. Coating boiled pasta with a layer of oil is not too helpful and it prevents sauce from clinging to the pasta. 


Sauce and pasta combination.....
The combination of pasta and delicious sauce is almost a science in itself. There are certain simple rules which to be followed to get the right combination, freshly made filled pastas need to be served with light sauce while other hand rolled pasta like tagliatelle can be served with robust sauces along with meats and seafood. While ready made dried pasta does not have much taste of it's own it is more dependent on the accompanying sauce so the choice of possible combinations is wider. 


Review of Zenfone 5 #MyAsusZenfone....

Taiwan-based Asus has expanded its India footprint with the launch of the new ZenFone smartphone series which is comprised of three models, the ZenFone 4, ZenFone 5 and ZenFone 6. Recently the company approached me for experiencing  ZenFone 5 to share my reviews about it as a food blogger, and I must accept it definitely got my attention with its good looks, user friendly interface and fast intel processor.

The ZenFone 5 comes with 2GB of RAM and will be sold with either 8GB or 16GB of internal storage plus support for up to 64GB microSD cards, that much of space is sufficient for me to store as many food photographs I want in my smartphone. And the best feature is fast intel processor which never creates problem even if the phone and external storage memory are overloaded with the data.

Look and feel...
The ZenFone 5 is a basic candybar phone with a simple yet appealing style, smooth finishing and lightweight body give it quiet a fascinating appearance. The ZenFone 5 is available in five colours in India: Charcoal Black, Pearl White, Cherry Red, Sky Blue, and Solar Yellow. I got my hands on the Charcoal Black one and it looks stylish and elegant.

For a person like me who like to use smartphone more than laptop, display section plays an important role, the ZenFone 5's front is dominated by its 5-inch display which makes browsing, editing photos, video conferencing much more convenient. ZenFone 5 is equipped with a high resolution 1280 x 800 HD IPS+ display,  sporting a pixel density of 294ppi for an impressive visual appearance. The color contrast of the display screen is well balanced with improved clarity, lighter and beautiful vivid colors. The Gorilla scratch proof screen is quite functional for a food blogger like me who's smartphone accompanies her in the kitchen as well.

Applications...
The phone comes with a number of inbuilt apps such as What's Next, which can track and manage apps; Do It Later, a to-do list; Super Note, for taking notes; Zen Link (Share Link, Party Link, PC Link, and Remote Link apps); Asus WebStorage, the company's cloud storage app (all users get 5GB free for life), and Omlet Chat, a free instant messaging app. For my this post I have used Super Notes to make the post much more interesting for the readers. Like other Zenfone Apps Super Notes is easily adaptable and leisure to work on.

Thanks for stopping by
Hina

Sambar Recipe - Quick Vegetable Sambar

$
0
0


Sambar is a spicy, sweet, succulent South Indian stew of lentil and mixed vegetables, a flavorsome curry accompanied by eitheridli, dosa, vada or rice. Few years back Sambar used to be defined as South Indian delicacy, confined only to the Southern states but now there is a major change in trend more and more households all across India are including Sambar in their daily menu, simplicity and taste profile of this dish has made a delicious reputation for itself among the food lovers.


While living in South India I discovered one secret about Sambar, which is it's recipe and ingredients changes even from one neighborhood to another, every family has their own recipe of Sambar andSambar Powder (see recipe here) passed on from one generation to another to carry forward the family legacy of cookery. After tasting variety of Sambar in different places my taste buds like better the Chettinad Style Sambar, it is somehow not possible for me to follow the traditional recipe to prepare Sambar on daily basis due to crunch of time so I get settled with this quick sambar recipe. There could be infinite combinations of vegetables in mixed vegetable Sambar along with Split Pigeon Pea/Toor/ Arhar Dal but always prefer using vegetables which are pulpy, soft, does not have an overpowering taste and takes almost equal time to cook as lentil like ridge gourd, bottle gourd, brinjal and so on. Here is my simple and quick recipe of mixed vegetable sambar...


Recipe: Sambar Recipe

Yield: Serves 4

Ingredients:
1 Cup pigeon pea lentil (arhar dal)
1 medium size ridge gourd/bottle gourd/brinjal
2 large tomato, roughly chopped
1 drumstick, cleaned and chopped into 1 inch pieces
2 tbsp tamarind paste
1 tbsp jaggery (roughly chopped)
Salt, as per taste
2 tsp Sambar Powder (see recipe here)
2 tsp turmeric powder
1 tsp red chili powder
3 - 4 Cups of water

For tempering:
1 tsp mustard seeds ( rai / sarson)
6 - 8 sambar onions or 1 large onion (roughly chopped)
6 curry leaves
4 cloves of garlic, fine chopped
2 tbsp ghee
2 - 3 dry red chilies
A pinch of asafoetida

Method:
To prepare sambar, clean, wash and soak dal in water for 15 - 20 minutes.
While dal is soaked clean and chop the vegetables for the sambar.
Transfer dal to pressure cooker with chopped vegetable, tomato, turmeric powder, red chili powder, salt and 2 Cups of water.
Cook dal in in the pressure cooker for 2 - 3 whistles on medium to high flame. The dal should become soft and mushy. Turn off the heat and release the steam from the pressure cooker.
Open the lid of pressure cooker and add chopped drumstick. Stir well and once again pressure cook dal on medium to high flame till 1 whistle comes. Turn off the heat and let the steam release from the cooker on its own.
Remove the lid of pressure cooker and add the sambar powder, tamarind paste, jaggery. Stir to combine well if the consistency of sambar is thick, then add more water.
Transfer sambar to a saucepan and then simmer the sambar for 10-12 minutes on a low flame stirring regularly in between so that the dal does not stick to the bottom.
Meanwhile prepare tempering, in a small pan, heat ghee over medium heat. Add mustard seeds once they crackle add onion, garlic, red chilies, asafoetida and curry leaves.
Fry till the garlic turns a light brown and the onion turn translucent. Pour the whole tempering in the steaming hot sambar. Close with a lid so that the flavors infuse for about 5-6 minutes.
Serve hot with Idli, Dosa or Rice.


Thanks for stopping by
Hina


Ragi Rotti (Finger millet flatbread) with Tomato Chutney

$
0
0

Ragi Rotti is a simple and healthy traditional flatbread of Karnataka, finger millet flour is mixed with variety of colorful seasonal vegetables and formed into dough to make delicious breads served with variety of condiments on the side, I settled for uncomplicated Tomato Chutney tempered with mustard seeds swimming in the ghee with some aromatic curry leaves. Ragi is one of the staple crops of Karnataka from the ancient era hence that explains the abundance of finger millet use in the cuisine of the state. Some of the conventional dishes of Karnataka has Ragi as the key ingredient like Ragi Dosa, Ragi Mudde, Ragi Idli and Ragi Ambli. While I was listing down recipes for the January month theme 'Karnataka' for #thekitchendivas (an endeavor to create a collection of recipes of Traditional Indian Cuisines in collaboration with a few bloggers who share the same passion of cooking) Ragi Rotti was one of the obvious choices to showcase the influence of local ingredients on the cuisine.


Sometimes dishes that are loaded with health benefits are greeted with furrowed brows on the breakfast table, the mere presence of any such dish that does not satisfy the family criteria of good food, drain out the appetite from the table. Such healthy mornings (I address them as healthy mornings) are a rare occasion in my kitchen but with some experience as a house maker any premature announcements about the ingredients is avoided, so that the food on the plate could be tasted without any pre conceived notions and taste buds share their genuine verdict about the same. But Ragi Rotti is one exception to the above list, it has become a routine affair for the breakfast or lunch with humble Tomato Chutney and each bite of the flavorsome bread embedded with sweetness of carrot, freshness of coriander is dipped in radiant sloppy chutney with equal enthusiasm till the finishing line. 


Recipe: Ragi Rotti

Yield: Makes 6 Rotis

Ingredients:
2 Cup Ragi Flour (finger millet flour)
1 medium size onion
4 - 5 curry leaves
Half bunch of coriander leaves
1 medium size carrot, grated
Salt, as per taste
1 tsp red chili powder
Water to bind dough
Oil for cooking rotis

Method:
To prepare the dough first finely chop onion, curry leaves and coriander. I prefer using food processor for this purpose to get even size fine chopped vegetables. In the food processor or electric chopper process onion, curry leaves, coriander together.
Sift ragi flour into a large bowl. Add in chopped onion, curry leaves, coriander, grated carrot, salt and red chili powder.
Mix the flour mixture nicely with fingers rubbing occasionally between palms to get crumbly texture.
Now using little water at a time bind firm and soft to tough dough of ragi flour. Knead for 2 - 3 minutes shape into a round ball. Cover with a kitchen towel and let dough rest for 15 minutes.

To make roti heat non-stick flat pan over medium heat.
Line kitchen counter surface with a clean dry parchment paper. Grease it with 1 tsp of oil. Pinch a portion of dough and roll into a ball and then flatten the dough ball using fingers.
Place the flatten dough ball over the parchment paper and with a rolling pin roll out to medium size roti of approximately 3 inch diameter. Ragi Roti is little thick so make sure not to roll it out too thin like regular chapati.
The dough is sticky in nature so grease the rolling with oil and do not put too much pressure while rolling chapati.
Now slowly transfer the roti from plastic sheet to your palm. Greasing plastic sheet beforehand makes this step easier.
Place the roti from your palm to heated skillet and cook on both sides. Do not flip roti more than once or twice as it is bit fragile.
Cover the pan with a lid and wait for 1 -2 minutes.
Remove the lid. Pour 1/4 teaspoon of oil on the ragi roti. Flip the roti gently with a spatula. Cook roti on one side.
Flip the rotti again after a few minutes. Pour 1/4 teaspoon of oil on the other side of roti.
Cook till a few dark brown spots appear on both sides. Ragi rotti is ready.
Serve hot with tomato chutney.


Recipe: Tomato Chutney

Yield: Make 1 Cup Chutney

Ingredients:
2 large size tomato, roughly chopped
1 medium size onion, chopped
4 cloves of garlic, chopped
Salt, as per taste
1 tsp turmeric powder
2 tsp red chili powder
1 tbsp oil

For tempering:
1 tsp mustard seeds
4 - 5 curry leaves
2 dry red chili
2 tbsp ghee

Method:
To prepare the chutney, heat oil in a pan over medium heat and saute onion, garlic until they turn light brown in color.
Then add chopped tomato, salt, turmeric powder and chili powder. Fry the masala till tomato are soft and oil get separated from the masala. Turn off the heat and let masala cool down to room temperature.
Blend the masala in food processor to smooth puree and transfer to a bowl.
For tempering the chutney, heat ghee in a pan over medium heat.
Add mustard seeds once they start making crackling noise add curry leaves and dry red chili. Fry for 1 - 2 minutes and then pour the tempering over the chutney.
Serve with Ragi Rotti.


The "Ragi Roti with Tomato Chutney" is part of the endeavor to create a collection of recipes of Traditional Indian Cuisines in collaboration with a few bloggers who share the same passion of cooking. Here is the Pinterest Board collection of recipes.

You can find more Traditional Recipes from Karnataka by #thekitchendivas:


Thanks for stopping by
Hina

Makki aur Aloo ka Partha with Video Recipe using Asus Zenfone 5

$
0
0

Makki aur Aloo ka Parathais an Indian flatbread made with maize flour and spicy potato dough, boiled potato is seasoned with various spices and then rubbed with maize flour to form smooth pliable dough to make Parathas. While the winter is slowly slipping from the seasonal calendar in Southern Indian it is still hard to resist not to make wintertime delicacies for the one last time until the next season of warm winter sun, misty air and chill winter breeze.  

Few weeks back I made Sarson ka Saag with Makki ki Roti (see recipe here) that left me with few cups of maize flour lying in one unattended corner of the kitchen shelf and pleading to be used soon.


While I was planning for the Makki ka Paratha there came the Asus Zenfone 5 project, to share my experience of the smartphone as a food blogger. After exploring for hours different features of the new found gadget the idea of video recipe was suggested by "His Genius", who agreed to help me with the video in turn of homemade butter laced Makki or Aloo ka Paratha with Lal Mirch Ka Achaar (see recipe here) and a cup of strong Masala Chai. And  then there was rolling, camera, action.....


With some initial stumbling steps we both managed to sail through the process of video making not only with flying colors but also without much apprehensions. The ZenFone 5 sports an 8-megapixel autofocus rear camera with an f/2.0 aperture lens and LED flash. There is also a 2-megapixel front camera. The video is shot in the natural light without using any flash so I guess that explains the HDR quality of the camera. Then to make video making much more easier for beginners like me there is an inbuilt application in Zenfone 5 Movie Studio, where video editing can be done in a hassle free manner. 
Here is my first Video Recipe made using Asus Zenfone 5....


Video from Asus Zenfone 5 #MyAsusZenfone5

Recipe: Makki aur Aloo ka Paratha

Yield: Makes 6 Paratha

Ingredients:
2 Cup maize flour
½ Cup whole wheat flour
Salt, as per taste
1 tsp red chili powder
2 tbsp oil + more for cooking paratha
Lukewarm water to bind dough

For potato masala:
2 medium size boiled potato
Salt, as per taste
1 tsp red chili powder
1 tsp turmeric powder
1 tsp mango powder
1 tsp cumin powder

Method:
To make potato masala, grate boiled potatoes in a bowl. Add in salt and spices. Mix with fingers to combine the seasoning evenly.
To bind dough for the bread, sift flour together in a bowl. Add salt, red chili powder, potato masala and 2 tbsp of oil. Combine the mixture with fingers to get bread crumbs like texture.
Using little water at a time bind soft dough. Knead the dough for 2 - 3 minutes.
Grease dough with little oil cover with a kitchen towel and let rest for 10 minutes.
Meanwhile heat non stick skillet over medium heat. Line kitchen counter surface with a clean dry plastic sheet. Grease it with 1 tsp of oil. Pinch a portion of dough and roll into a ball and then flatten the dough ball using fingers.
Place the flatten dough ball over the plastic sheet and cover with another plastic sheet. With a rolling pin roll out the dough ball to medium size roti of approximately 3 inch diameter.
Now slowly transfer the paratha from plastic sheet to your palm. Greasing plastic sheet beforehand makes this step easier.
Place the paratha from your palm to heated skillet and cook on both sides. Spread 1 tsp of oil on one side and flip the paratha grease another side as well with oil. Cook paratha on both sides until nice and golden.
Transfer to a serving plate and serve hot with Homemade Butter (see recipe here).


Thanks for stopping by
Hina

Lal Mirch ka Achaar (Stuffed Red Chili Pickle)

$
0
0

Lal Mirch ka Achaar or lal mirch ka bharwa achaar is red chili pickle stuffed with homemade spice mix soaked in mustard oil, this pickle takes 2 - 3 days in warm winter sun rays to get ready for consumption and has shelf life 1 year if stored in sealed jar at room temperature and handled with great care. This recipe is adapted from extremely talented food writer and consultant Sangeeta's blog called Banaras KaKhana with her due permission. 


For a country that is obsessed with food and everything to do with food, pickles are an integral part of our food culture. Spicy, tangy, sweet, sour, bitter are some of the defining words for Indian pickles, our pickles range for every season, from every region and of all the local produce. Over the years pickles have become ritual in our household kitchens and an inseparable part of our tradition, if we peep into the history we could easily find traces of pickle in the royal kitchens, even the greatest of emperors could not resist the temptation of evoking their taste buds with slug of pickle. A small spoonful of pickle in the plate add on so much flavors that it brings even the dullest of meals to life, such is the magic of pickle. 


Since I got married pickling is one technique in kitchen which I never attempted maybe I was too content with yearly supply of pickles from my mother-in-law and it is human nature not to make efforts towards something which is easily accessible.  While I was busy plunging into the gifted pickle jars words of my mother always ring a bell in my ears, "Pickling is an art which only few can master." And now I can comprehend the depth of her words with much more seriousness when I made my first genuine attempt towards grasping the science of pickling, unlike other dishes pickling cannot be learnt by blindly following the recipe, at each and every step of pickling one need to apply some amount of wisdom, basic knowledge of ingredients behavioral science and observant culinary senses.


When I first spot these light airy deep red chilies in supermarket my reflexes could only think of stuffed red chili pickle, which my palate was craving from a long time. Back home the chilies were tucked in fridge for few days while I was desperately searching recipe for a naive pickling enthusiast like me. Once I found the recipe the pickling marathon began, somewhere deep within there was a desperate urge to prove that pickling is my cup of tea, which simply magnified my attention to detail syndrome. After waiting for the preferable weather mood finally the day was marked when quite winter air in the house was filled with pickle masala drenched in deep golden mustard oil with nervous fingers when I stuffed chiles with the masala my senses were shaken up from deep slumber with the rustic aroma of chilies and the masala. For three days I kept my fingers crossed and a hawk eye on the pickle jar my routine chores included shifting the pickle jar as per the sun rays during different hours of the day. After so much work of patience and uphill battle when we first tasted the pickle my heart was filled with pride and eyes were moistened on the success of my first step towards the art of pickling.

Recipe: Lal Mirch Ka Achaar
Recipe Adapted from Banaras Ka Khana

Yield: 8 - 10 medium sized red chilies

Ingredients:
10 medium size thick red chilies
1/4 Cup mustard oil

For the stuffing masala:
2 tbsp mustard oil
2 tbsp amchoor powder
1 tbsp red chilly powder
3 tbsp black mustard seeds
1 tbsp fennel seeds
1 tbsp fenugreek seeds
1 tbsp ajwain seeds
2 tsp kalonji seeds (nigella seeds)
2 tbsp salt or to taste

Method:
To prepare chilies for the pickle wash, wipe with a kitchen towel and sun dry for 1 - 2 hours to completely dry them.
While chilies are sun drying prepare the masala. Add all the masala in grinder jar except mustard oil and blend to make a coarse powder. Once masala is powdered mix in mustard oil and mix nicely with a spoon.
Wear surgical gloves or kitchen gloves if your skin is sensitive to chilies.
With a sharp knife cut off the crown of the chilly and slit in between lengthwise half way through leaving intact from the lower end. Using knife hollow out the innards of the chilies, including all the seeds and the veins.
Now stuff each chilly with the masala. I filled masala with my fingers to evenly stuff the chilly with masala.
Arrange all the chilies in clean, dry jar. Drizzle mustard oil from top over the chilies in jar.
Seal the jar with lid and keep in the sun. Pickle takes 2 - 3 days in bright sun to get ready.
You can drizzle some more oil into each chilly everyday.
Once ready pickle can be stored at room temperature for 1 year.

Note: Always keep water away from pickles even a single droplet of water is enough to spoil the entire pickle.


Thanks for stopping by
Hina

Dawat-E-Khaas with Master Chef Kunwar Rani Kulsum Begum @Cubbon Pavilion, ITC Gardenia

$
0
0

Cubbon Pavilion at ITC Gardenia, Bangalore is hosting Dawat-E-Khaas with Master Chef Kunwar Rani Kulsum Begum, from 23rd January - 1st February 2015. Dawat-E-Khaas anchored by her highness Kulsum Begum is a culinary journey through the regal past of the princely state of Hyderabad. Begum Sahiba was born in the royal household of Salar Jung III the erstwhile Nawab of Hyderabad and marriage introduced her to another Nawabi city of India - Lucknow. Over the years despite of living in different parts of the country her love for Hyderabad cuisine is unwavering and true hearted. The evening progressed with a conversation with Begum Sahiba and her culinary journey from the royal household kitchen to one of the finest hotels of the country, regardless of long day in the kitchen her presence on the dinner table was equally enchanting as her Hyderabadi style Hindi and heart warming innocent smile. 


For ‘Dawat-E-Khas’ the menu that Begum Sahiba has chosen is no doubt an amalgam of the various influences that shaped the cuisine from the ancient era till date. The Master Chef herself thoughtfully designed the menu and the recipes for Dawat-E-Khaas and she makes sure during the entire week of festival none of the dishes are repeated in the menu, such impeccable is the collection of her recipes. These recipes are part of her royal treasure and represents her family traditions, sincerely passed on from one generation to another, for each dinner of Dawat-E-Khaas Begum Sahiba herself rustle up all the dishes in the menu in the best possible conventional manner. 


Dawat-E-Khaas is a buffet spread comprising of two - three appetizers, main course of vegetarian - meat/shelfish curries, biryanis/pulaos, flatbreads and desserts. On the particular day entree were vegetarian beetroot ke kebab and on the contrary prawns ke tikki, both were equally mouth melting and delicately flavored but our favorite was beetroot ke kebab for the unique inclusion of beetroot in kebab. Moving towards the main course from the vegetarian spread we tasted each one of them - Mutter Ki Dal, Baigan ke Katle, Chukundur ka Bharta, Chichinda aur Masoor ki Subzi, Paneer Ka Salan, Methi Pulao after tasting these vegetarian delicacies I realized Hyderabad cuisine has much more to offer than biryani/meat curries. When Begum Sahiba was asked about the vast vegetarian feast she explained how back home their daily meals were accompanied by variety of dals, vegetarian curries along with meat/fish and especially during the month of Muharram her entire family would consume only vegetarian meal. 


For the second round of main course we tasted the meat/seafood curries - Murgh Moongfali, macchi Hara Pyaaz, Jhinga Kofta, Ghost Aloo ka Salan, Murgh Narwal Pulao, Kachhe Ghost ki Biryani was not in the menu that day and I definitely missed it on my plate. Both the vegetarian and meat curries, side dishes, biryani/pulao had distinctive pleasing taste, with each spoonful hours spend on slow cooking these dishes could be tasted, there were no traces of over powering whole spices, each dish was hearty , wholesome and flavorful. The menu was the quintessential balance of vegetables, meats, shellfish, fish and rice. 


The dessert selection for the evening menu was simply exquisite and delectable - Paheli ke Ande (melon ball poached in delicate china grass pudding resembling soft boiled egg), Halwe ki Gilori (halwa folded inside thin fluffy crepes) and Chawal ke Mujjafar (rice pudding in which each grain of rice came together still remain intact and fluffy). This was my first experience with these unusual Hyderabadi desserts, each dessert had that saffron laced aroma around it embellished with slivered pistachios, dry fruits, rose petals standing with elegance in the middle of the buffet and plated well enough to tempt diner towards them. 


My sincere thanks to Chef Madhav Nambiar (Jr. Sous Chef, Cubbon Pavilion) for making the evening so memorable. 


Disclaimer: The review was done on an invitation from Cubbon Pavilion - ITC Gardenia, my opinion and words are unbiased and totally based on my experience at the restaurant. But as they say, "Food is Subjective" so kindly exercise your own discretion, with the understanding that this is writer's personal opinion. 


Thanks for stopping by
Hina

Khara Bhath (Vegetable Rava Upma)

$
0
0


Khara Bhath ... the savory semolina porridge is the staple breakfast and teatime delicacy of Karnataka also known as Rava Upma in other Southern regions. Semolina is roasted and cooked with colorful vegetables to get the thick flowing porridge, icing on the cake is conventional tempering of mustard seeds, curry leaves, bengal gram and urad dal in mound of ghee (clarified butter). The pleasant, bright and sunny mornings are reveled with a steaming bowl of khara bhath and a cup of home brewed filter kappi on the side, and my first introduction with this dish was much similar in one of the local brahmin cafes. 


Last few weeks were quite demanding in nature at professional front so the quest for simple, hearty and fulfilling breakfast choices is always on the priority. In our house weekday morning meals are a quick affair, grabbing breakfast in few seconds before we rush to our work destinations is an unpretentious ritual, anything that can be cooked with ease in the morning wee hours fits well in my routine. In this specific category of hast and hurried breakfast some dishes are always included Rava Idli, Khara Bhath, Dalia Upma or Whole Wheat Pancakes. While the Sunday supper story on the contrary is more slow and steady where each spoonful of Khara Bhath is savored slowly in between pages of newspaper and sips of tea/coffee. Each bite of the porridge is praised as the semolina melts in mouth followed by the al dente vegetables and fine bits of tempering, all adding to the experience of enjoying the dish. The lazy Sunday morning is spend around around the table with our spoons grabbing for second helping of Khara Bhath and eager for another round of tea/coffee. Over the years of stay in Southern India traces of local food culture are crystal clear on our lifestyle and so is the breakfast items like Rava Idli and Khara Bhath. 


Hereby, with Khara Bhath there comes to an end the January theme of #thekitchendivas (endeavor to create a collection of recipes of Traditional Indian Cuisines in collaboration with a few bloggers who share the same passion of cooking) - Karnataka Cuisine, in the month of February there will be new series revolving around the monthly theme of Indo - Chinese. 

Recipe: Khara Bhath

Yield: Serves 4

Ingredients:
1 cup Semolina
1 medium size onion, finely chopped
1 medium size carrot, finely chopped
¼ Cup peas (fresh/frozen)
1 green chillies, finely chopped
1 tsp ginger-garlic paste
¼ tsp asafoetida
6 - 8 cashews, sliced
5 - 6 curry leaves
1/2 tsp mustard seeds
½ tsp cumin
1 tbsp chana dal
1 tbsp split urad dal
Salt, as per taste
2 tbsp ghee
1/2 tsp of turmeric powder
4 Cup of water

To be ground into powder:
1 tbsp coriander seeds
1 dry red chili
1/2 inch piece of cinnamon
2 cloves
1 tsp gram dal
1 tsp urad dal

To Garnish:
2 - 3 tsp grated coconut
Juice of 1 lemon
2 - 3 tsp of ghee

Method:
To prepare Khara Bhath first dry roast ingredients mentioned above under “to be ground into powder” in a pan over medium heat until aroma is released. Blend dry roasted in mixer to coarse powder. Set aside masala in a bowl until required.
Dry roast semolina in a heavy bottomed pan over low to medium heat until light brown in color. Once semolina is roasted turn off the heat and transfer to a bowl.
In a pan heat ghee over medium heat and roast cashew slivers until light golden in color. Transfer to a bowl and keep aside.
In same pan add mustard seeds and let it crackle. Now add asafetida, cumin, gram dal and urad dal and fry until light brown.
Add chopped green chillies, ginger garlic paste, curry leaves and fry for few seconds. Now add finely chopped onions and fry until they turn light brown in color.
Now add finely chopped carrot, peas stir for few seconds. Cover the pan with a lid and cook for 2 minutes.
Add turmeric, salt, powdered masala to the vegetables stir and cook for a minute.
Meanwhile boil water in a large bowl in the ratio of (1C rawa:4C water) until it comes to roaring boil.
Now slowly add boiling water to the vegetable masala, stir and cover it. Let it come to a boil once.
When the water comes to boil add semolina in small portions to boiling water and continuously stir it to avoid lump formation. After all the semolina is added to water cover it and cook for 2-3 minutes on low flame until semolina is completely cooked.
Turn off the heat add lemon juice to khara bhaath and mix well.
Transfer to serving bowls garnish with chopped grated coconut and fried cashew nuts and serve. Add a dollop of ghee on top before serving.

The "Khara Bhath" is part of the endeavor to create a collection of recipes of Traditional Indian Cuisines in collaboration with a few bloggers who share the same passion of cooking. Here is the Pinterest Board collection of recipes.

You can find more Traditional Recipes from Karnataka by #thekitchendivas:


Thanks for stopping by
Hina


Fruit Cream Recipe with Asus Zenfone 5

$
0
0


Fruit Cream ..... the delightful pudding of fresh fruits enveloped in sweet blend of yoghurt, cream and milk. Fruit Cream is a very English kind of pudding the way dessert is arranged in layers, then the whipping of yoghurt, it all reminds me of trifle pudding and I have this strong inkling that like many other Anglo - Indian dishes fruit cream was also introduced by Englishmen to the Indian palate during their century long stay in the sub continent. 


Over the years fruit cream has gained status of most commercial and well liked dessert, for some it is simply the white mass of cream loaded with roughly chopped seasonal fruits sweetened with tons of white sugar and served chilled to satiate the taste buds longing for ice cold desserts during the scorching summer season. As a kid I always yearned for special occasions when my mother would whip up a large bowl full of fruit cream that would sit in the fridge for hours, every-time I open fridge my curious eyes peep into the bowl and give it one greedy look keeping track of minutes left in dinner so that I get my share of bowl full of fruit cream. 


Eventually after marriage somehow I forgot about this humble dessert and took pride in making fancy complicated desserts until recently when one of husband's aunt shared recipe of making fruit cream from her recipe diary. At first I dismissed the idea of taking notes of something as simple as fruit cream but then her creative narration of the dessert fascinated me towards the idea of layered pudding. With ongoing Asus Zenfone 5 project this is the last post in the series and hence ending it on a sweeter note with Fruit Cream.


Review of Asus Zenfone 5 #MyAsusZenfone.....

In addition to other exciting features, Zenfone 5 sports a Power Saver app offering users three options: an ultra-saving mode that disconnects the network connection when the device is asleep; optimised mode, which doesn't switch off data, and a custom mode which can be tweaked by the user, which could be used to increase battery life while traveling and save energy.

The ZenFone 5 sports an 8-megapixel autofocus rear camera with an f/2.0 aperture lens and LED flash. There is also a 2-megapixel front camera. The camera app offers 18 modes - there's Auto, HDR, Panorama, Night, Low-light, Selfie (detects faces within the frame automatically), Miniature, Depth of Field (background blur), Smart Remove (removes unwanted moving objects) are some I used out of 18 modes.

The ZenFone 5's camera application also offers settings for shutter, focus, brightness, image size, ISO, white balance, colour effects, timer, geo-tagging, shutter sound, and storage, which as a food photographer I thoroughly admire. Zoom can be adjusted by pinching in and out, and the volume buttons also double as shutter keys when you're in the app though there is an onscreen button as well. We tested the camera of the ZenFone 5 outdoor on a bright sunny day and indoors in sufficient natural light. The photos were crisp and had good amounts of detail.

Recipe: Fruit Cream

Yield: Serve 4 to 5

Ingredients:
½ litre thick curd
1 Cup light cream
4 tbsp powdered sugar or as per taste
¼ Cup milk, if required
2 tbsp pistachio slivers
2 tbsp granulated white sugar
2 tbsp water

Fruits required:
8 to 10 fresh strawberries
6 to 8 red globe grapes
Other fruits (mango/kiwi/litchi/orange/raspberry etc)

Method:
To prepare cream for the fruit cream, first line metal strainer with muslin cloth or any other kitchen linen. Pour curd over the muslin cloth and let water drain out from the curd.
After few minutes tie muslin cloth into a knot shape and hang over the kitchen sink or any other high point in kitchen. And let the curd stand this way for 3 to 4 hours.
The end result from this process will be thick soft cheese like hung curd. Open the muslin cloth next day and transfer thick ball of curd to a bowl.
Add sugar, cream and using electric hand blender (in this case I used KitchenAid 7 speed blender) whip the mixture to get smooth pouring consistency liquid. If the liquid is still thick add little milk and then whip again for 5 minutes. There should not be any lumps in the liquid mixture. Taste for sweetness and adjust the sugar amount accordingly.
Keep the cream mixture in fridge while you prepare the fruits.
Clean, wash and pat dry all the fruits with kitchen towel. Remove the green stem of strawberries and finely chop them. Transfer berries to a pan sprinkle granulated sugar and water. Simmer over medium heat until berries turn soft and ooze out their juices. We are looking for fruit compote like consistency. Turn off the heat, transfer berry compote to a bowl and let it cool down to room temperature.
Meanwhile slice the remaining fruits (grapes/mango/kiwi). I have used combination of strawberry, red globe grapes and mini oranges along with pistachios.
To assemble fruit cream, in serving bowl or glasses line the bottom with layer of chilled cream mixture then on top arrange layer of sliced fruits. Third layer will be again of cream and then strawberry compote.
Once layering is done on top garnish with pistachio slivers and fruit slices. Keep in fridge for chilling before serving. Serve chilled.


Thanks for stopping by
Hina

Contest Alert - Join the KitchenAid Probaker 2015 quest and Win Big

$
0
0

Hello Home Bakers!

Here is a special baking talent quest by KitchenAid - a search for India's best home baking talent called as KitchenAid's Quest for the Probaker 2015. By this contest KitchenAid acknowledges home bakers passion, their creation of international baking delicacies which only seemed to exist in TV shows, glossy magazines, expensive menus of luxury hotels or maybe dreams; are now within the reach of the ardent Indian foodie, all made possible by home bakers. KitchenAid salute the perfectionist and fearless in you that makes you reinvent, innovate and experiment with the classics to offer your clients the extraordinary every time. It's about time that we celebrate the phenomenon that's you!   

There's no charge to participate and there's a lot to be won. Need more reasons to participate in the contest? Here are 6 reasons to participate in KitchenAid Pro Baker Contest:

1. THE PRIDE: Yes,you deserve to be more than just a baker next door. It's time to let all that sweat and blood you've put into your passion shine in the nationwide spotlight. Imagine being counted among the finest bakers of the nation. That's the feeling we're talking about.

2. THE PRIZES: From the time you apply to the finale, we've folded in amazing surprises for you at every step of the quest. Now we won't want to spoil the surprises but a little birdie tells us there are vouchers, free trials, and a special cake decoration workshop in the goodies.

3. THE SCALE: No,it's not your local talent hunt. It's the quest for India's best by one of the most premium international kitchen appliance brand. So everything ought to be larger than life. The jury includes celebrity chefs, gastronomic geniuses from the kitchens of Leela, JW Marriott and the likes; and the creme de la creme of the culinary world. The challenges, the venues and mention in the best food magazines. Could it get more tempting?

4. THE AFTERGLOW: Before we assume things here, let's get specific. Remember the exhilarating satisfaction of acing an impossible challenge. A feeling we believe every homebaker has relished while customizing difficult orders or mastering a new skill. Now imagine being challenged by the who's who of the baking industry. Imagine perfecting your cake decoration skills with one of the world's most sought after chefs. Got your adrenaline rushing? Well there's a lot more in store for you.

5. THE ULTIMATE COMPANION: Is all the talk of the scale and the challenges giving you butterflies in the stomach? Well, we have that covered too. Our shortlisted candidates get to try the iconic KitchenAid stand mixers, that'll later help them ace the regional rounds and later in the finale too. With the power and precision of a global kitchen expert by your side, the only ingredient you'll need to outshine the competition will be your passion!

6. THE OPPORTUNITY TO BE IMMORTALIZED: Wait, we're not talking of zen or black magic. But just imagine being crowned India's best baking talent. Now isn't that legendary. A chance to be a household name in the art of baking. Something you can proudly engrave on a tombstone or turn into an autobiography. Now isn't that the sweetest way to be remembered for generations to come.

Can't wait to be part of this epic quest? Click here to Participate

To know more about the contest guidelines Click here


Thanks for stopping by


Hina

Vegetable Manchurian with Fried Rice

$
0
0


Vegetable Manchurian with Fried Rice is one congenial Indo-Chinese comfort food, when I say Indo-Chinese it refer to Indian version of Chinese dishes which are revamped over the years to suit the Indian palate. Manchurian which has always topped the menu cards of Indian Chinese serving restaurants, got it's name from Manchuria, which is actually a historical name for Northeast China. Light, spongy golf ball sized deep fried vegetable dumplings plunged in piquant peppery sauce relished with stir-fried rice. This divine combination is always been in house favorite Friday night meal and despite of relishing it almost every month we are still not humdrum by the dish.


In the last few decades this Indo-Chinese food fare has become so popular among the food lovers, especially in Northern region of the country, reason being it's simplicity, bursting flavors and hint of spicy savour, making it quintessential dish for hot and sour flavors quenching taste buds. February month theme of #thekitchendivas (an endeavor to create a collection of recipes of Traditional Indian Cuisines in collaboration with a few bloggers who share the same passion of cooking) recipes revolves around Indo - Chinese Cuisine, so there will be an array of interesting popular recipes from the cuisine during the entire month. With Khara Bhath and other traditional Karnataka recipes, theme of January came to an end leaving behind near-about twenty conventional recipes from the state cuisine along with wide appreciation from the readers. 


Recipe: Vegetable Manchurian

Yield: Serves 4

Ingredients:
For the manchurian balls:
1 small size cabbage
2 medium size carrot
¼ Cup finely chopped spring onion greens
2 tbsp bread crumbs
1 tsp freshly crushed black pepper
2 tbsp all purpose flour
2 tbsp cornflour
Salt, as per taste
Oil for deep frying

For the manchurian sauce:
1 large onion, finely chopped
3 - 4 cloves of garlic, finely chopped
1 inch piece of ginger, finely chopped
2 red chilies, fine chopped
1 medium size capsicum, cut into small cubes
1 tbsp corn flour dissolved in 2 tbsp water
1 tbsp soya sauce
1 tbsp tomato sauce
1 tbsp white vinegar
2 water or vegetable stock
1 tbsp green chili sauce
1 tsp freshly crushed black pepper
Salt, as per taste
Oil for cooking

Method:
To prepare the manchurian balls, first wash cabbage, carrot and spring onion in water. Pat dry with kitchen towel.
Now grate carrots and transfer to a bowl. I used Food Processor to do the job of  chopping cabbage or mincing it, cabbage can be grated also.
Mix all the ingredients except oil in a large bowl. Combine with your fingers to get soft pliable dough like mixture. Keep aside for 10 minutes.
Pinch small portion out of the mixture and shape into small round balls. Once all the balls are ready keep them in the fridge for sometimes till oil is heated. Keeping manchurian balls in fridge for 10 - 5 minutes make them firm and there is less chance of balls falling part while deep frying.
Meanwhile heat oil in a deep frying pan over medium heat to fry the manchurian balls.
Deep fry balls on boil over medium heat in small batches, do not overcrowd the frying pan at one time else balls will not get fried properly.
Once balls are deep brown from outside transfer to a plate lined with paper towels. Turn off the heat and set balls aside until required.

To prepare the sauce, heat oil in a saucepan add onion, ginger, garlic, chilies and fry over high heat for 2 - 3 minutes or until you can smell the aroma. No need to fry the onion for too long.
Now add chopped capsicum, soya sauce, vinegar, chili sauce, tomato sauce, salt, black pepper and fry for 5 minutes over medium to high heat.
Add water or vegetable stock whatever you are using I prefer using stock. Stir to combine and let sauce simmer for 5 minutes.
Add the cornflour paste to thicken the sauce and again simmer the sauce over medium heat. Once sauce is thickened as per desired consistency add the manchurian balls to the sauce and simmer for 1 - 2 minutes.
Turn off the heat garnish with chopped spring onion greens.
Serve hot with fried rice.


Recipe: Vegetable Fried Rice

Yield: Serves 4

Ingredients:
1 cup long or medium grained rice
4 Cup water
¼ cup each of finely chopped spring onion whites,
1 medium size carrot, finely chopped
Other vegetables (capsicum, beans, mushrooms) finely chopped
3 - 4 cloves of garlic finely chopped
1 tsp soy sauce
1 tsp vinegar
Salt and black pepper, as per taste
2 cooking oil

For Garnish:
Chopped spring onions greens

Method:
To make fried rice first, clean and rinse rice till the water runs clear of starch. Soak rice in water for at least 30 minutes.
Drain soaked rise and transfer rice to a bowl.
Boil water in a large pan with salt. When water comes to gentle boil add drained rice and stir so that rice does not stick to the bottom of the pan.
On a low to medium flame cook rice stirring occasionally without lid.
When the rice becomes al dente (80% cooked) or just cooked, turn off the heat and drain rice in a colander. Rinse boiled rice with water and let sit in colander for few minutes.
Meanwhile heat oil in a wok over medium heat. Add chopped white onion, garlic and stir fry over high heat for few minutes.
Then add all the finely chopped vegetables and fry on high heat for 5 minutes. Make sure to continuously toss and stir while frying so that the vegetables  are uniformly cooked and do not get burnt and remain crunchy.
Add soy sauce, vinegar, salt and pepper. Stir to combine and add the rice. Stir fry for a few minutes till everything is evenly combined.
Turn off the heat garnish with chopped spring onion greens.
Serve the veg fried rice hot.


The "Vegetable Manchurian with Fried Rice" is part of the endeavor to create a collection of recipes of Traditional Indian Cuisines in collaboration with a few bloggers who share the same passion of cooking. Here is the Pinterest Board collection of recipes.

Here are some more Indo - Chinese Recipes by #thekitchendivas:


Thanks for stopping by
Hina


Review - Street Food Festival at M-Cafe Marriott, Whitefield

$
0
0

Whitefield Street Kitchen is the celebration of Street Food Culture from all over the country at M-Cafe, Bengaluru Marriott Whitefield on every Wednesday. The concept of this special food festival is about showcasing everything that’s strikingly reminiscent of Indian culture – from a hearty spread of the Indian street food to hostess welcoming guests in traditional attire or to playing Indian fusion live music, it all transports diners to the street food selling by lanes. M Cafe is multi cuisine restaurant located at the central lobby of the hotel, comfortable and spacious ambiance make it ideal choice for business lunches during the day and large family gatherings for the weekend brunches. 


To taste the variety of street food from around India at one time is a moment of treat for a food lover, and that is exactly what Bengaluru Marriott Whitefield Street Kitchen is hosting. A sheer indulgence in favorite street food delicacies from different parts of the country - fusion marvels from Kolkata's version to the Guajarati inspired 'Mumbai Chaat', delicious Lucknowi Kebabs, Biryanis, Tibetan Momos, Dosas, Stuffed Paranthas along with some conventional mocktails and cocktails to accompany the food. No more waiting in the long queue or to be hygiene conscious to take pleasure in your favourite street food items. To make the whole experience more memorable for the diners, there are live counters of Jalebi, Fish fry, Puchkas and of course the bar, which is set up in a hand cart. Diners can also engage in pottery making,  heena designing and handicraft shopping. 


Talking about the food honestly speaking for the first time I did not follow the formal three course approach to the meal, going with the mood of the occasion I tasted each and every item one after the other. We started with some Chaats (Puchkas, Sev paid, Raj Kachori) which built our appetite for Mumbai delights Pav Bhaji, Keema Pav with a round of refreshing desi drinks Kala Khatta, Jaljeera, Nimbu Paani. From these small plates my favorite was Keema Pav and so was the opinion of my fellow diners, and from drinks Kala Khatta was clearly the crowd pleaser. 


After the sweet and spicy medley of flavors I gladly plunged into the plate full of Tibetan dumplings Momo, Chowmein with hot red chutney on the side and I could never resist myself from relishing another plate of Chicken Momos. Then followed an array of delectable, aromatic kebabs from the Lucknowi/Awadhi food stall the usual Galouti Kebabs with Ulte Tawe ka Paratha (Paratha cooked on upside down pan) with some mint chutney and onion juliennes. For the main plates I choose the Awadhi Chicken Biryani with raita and tomato salan on the side. To satiate the sweet craving taste buds we had Jalebi, Mixed Fruit Chaat and Gadbad (loaded with four types of ice creams, slivered dry fruits, sliced fresh fruits, corn flakes, rose syrup, falooda, sabja) with Jalebi I missed the flavor of chilled Rabri and Gadbad is actually a medley of all sugar loaded ingredients hence I am always not keen on ordering it while eating out. 


The flavors of the dishes are not very nouvelle but yet appealing and pleasant change from gourmet plated dishes especially for the diners who are new to the country and totally unaware about it's vast Street Food Culture.  The price for the buffet is Rs 1450 ++ for adults including beverages. 


Disclaimer: The review was done on an invitation from Marriott Hotel, Whitefield, my opinion and words are unbiased and totally based on my experience at the restaurant. But as they say, "Food is Subjective" so kindly exercise your own discretion, with the understanding that this is writer's personal opinion. 


Thanks for stopping by
Hina

Crispy Honey Chilli Chicken

$
0
0

Crispy Honey laced chicken is actually been in our dinner rotation for years, the heat of red chilies and sweet punch of honey is match made for weekend leisure dinner, tons of flavor from just a few basic ingredients. Throw together a quick salad while the chicken cooks, pour in chilled beer into those tall glasses and gorgeous dinner is literally on the table in few minutes. Even though it has the word spicy, it’s pretty mild and not burning hot inedible spicy. If the amount of red chilies going in still the matter of worry then cut down the amount of red chilies to half. Marinating chicken beforehand is an integral part of the recipe, to make the aroma of garlic and hotness of chilies penetrate through the layers of chicken pieces marination is the only solution. 


These days in midst of hard pressed weekdays somehow the hope of quite and relaxed weekends keeps me motivated throughout. With some new projects taking shape and the work arena expanding beyond the four walls of the house, most of the days are lost in the toil between home and new found workspace, in such busy circus thinking about food is beyond imagination despite of working around the substances of food all day long. The unattended ingredients sitting in the pantry and dull weekday menu need the house lady's immediate attention on her spare moments (which are rare these days in my case) so the menu on such days has to be exciting enough to brighten up the mood of the dinner table. Chinese stir fried chicken accompanied by humble fried rice dotted with carrots and beans accompanied by uncomplicated green salad and to complete the frame a glass of cold refreshing beverage on the side is an old school trick to transform monotonous meals into the most exiting ones. Here is the recipe of one of those weekend meals...


Recipe: Crispy Honey Chilli Chicken

Yield: Serves 2

Ingredients:
For Chicken Marinade:
250g boneless chicken pieces
Salt, as per taste
6 cloves of garlic
4 fresh red chilies
1 tsp soya sauce
2 tbsp water

Other Ingredients:
1 medium size onion, cut into cubes
3 - 4 Garlic Cloves, finely chopped
1 inch piece of ginger, finely chopped
1 medium size capsicum, cut into cubes
2 ½ tsp Tomato Ketchup
2 tsp Soya Sauce
2 tsp red chili vinegar
2 tsp honey
1 egg, beaten
1/4 Cup cornflour
Salt, as per taste
Oil for deep frying

Method:
To marinade chicken first clean, wash and pat dry chicken pieces. Keep aside.
In blender make smooth paste of garlic, red chili using 2 tbsp of water.
Mix all the ingredients of marinade in a bowl including garlic chili paste. Add chicken pieces, rub marinade over the chicken pieces to coat each piece evenly with the marinade. Cover bowl with a cling foil and keep in fridge for at least 1 hour.
Meanwhile chop vegetables for the stir fry.
After 1 hour take out the chicken from fridge. In two bowls arrange beaten egg and cornflour next to each other.
Heat oil in a frying pan over medium heat. Dip chicken piece first in beaten egg then in cornflour and add to hot oil for deep frying. Similarly fry all the chicken pieces till crisp and golden from outside over medium heat. Drain fried chicken in a plate lined with absorbent paper.
To stir fry the chicken, heat little oil in wok, throw in chopped ginger, garlic. Stir for few seconds but do not brown the garlic. Add chopped onion and fry for 1 - 2 minute over high heat.
Add capsicum, vinegar, sauces and salt. Sauté for 2 - 3 minutes over high heat.
If you are ready to serve the chicken add the crispy fried chicken and stir well so that chicken pieces are coated well with the sauce.
Garnish with spring onion greens, drizzle honey over chicken and serve hot with Fried Rice (see recipe here).
If not serving chicken immediately then turn off the heat of the stir fry vegetables and set aside until ready to serve. Heat up vegetables while adding chicken into the sauces just before serving.

The "Crispy Honey Chilli Chicken" is part of the endeavor to create a collection of recipes of Indian Cuisine in collaboration with a few bloggers who share the same passion of cooking. Here is the Pinterest Board collection of recipes.

You can find more Indian Chinese Recipes by #thekitchendivas:


Thanks for stopping by
Hina
Viewing all 1338 articles
Browse latest View live